Describes step-by-step, how to
configure page settings using Page Manager.
From the applicable Feature Management
page click on the Page Manger button or from Page Type Manager click on the
Page Type.
To inherit from Site Settings select
the “Site Settings” radio button option, to inherit from Page Type Default
Settings select the radio button option “Page Type Default Settings”; otherwise
select the “Other” radio button and select a collection from the list box.If you are editing Page Type Settings the
option “Page Type Default Settings” is not displayed.
For each option that you want to
override from the inherited settings, check the Override checkbox before
making the selection.
Click on the Page Style option “View
Styles” to open the Style Selection page and
select a Page Style.
Browse the Page Styles listed on the
Standard tab.
When you find one that you like, click
the “Select” option.
Repeat the same process for the Header
Style and the Footer Style.
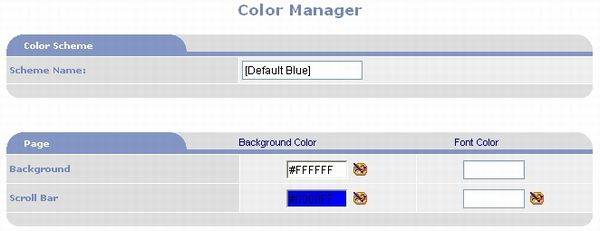
Click the Color Scheme “Edit”button to open Color Manager and
configure a color scheme.
Select Background and Foreground
(Font) colors for each option. You have the choice of manually entering
the color’s hexadecimal code or using the Color Palette by clicking on the
icon.
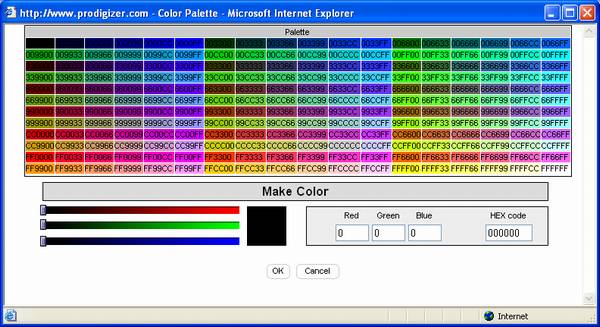
When using the Color Palette to select
a Color, click the color then be sure to click the Ok button after making
your selection.The Ok button is
located at the bottom of the Color Palette window.
When finished with your color
selections, click the Color Manager page’s Close button and be sure to
answer “Yes” to save your changes.
Click the Header Collection
“Edit”button to open Header Collection Manager
and select components such as menu bars to be included in your
header.
The number of menus and their type is
determined by the Header Style that you have chosen.For this tutorial let’s presume that
your Header Style contains a single menu bar which uses drop downs.
Highlight Header Menu Bar 1 in the
Available Components.
Click the “Add New” button to create a new Record Set for the
Menu Bar.
Create Menu Topics.See the chapter of the guide titled Menu
Features in Details for an explanation of Menu Builder.
Create Menu Items for each Menu Topic.
Close Menu Builder.
Highlight the newly added Record Set
then click the right arrow button to add the Component and Record
Set to the Selected Components list.
Browse the Available Components and
add the ones you want included in your header such as Site Search, Login,
etc.
When finished with your Header
Collection, click the Close button and be sure to answer “Yes” to save
your changes.
Repeat the same process for each Side
Bar, Main Content and Footer Collections.Note that the Page Style determines if the template has either Left
or Right Side Bars.
Enter a title in the Page Title field.
Enter a description of your website in
the Meta Tag Description field.
Enter a list of keywords for your
website in the Meta Tag Keywords field.
Click the Save button to save the
collection.
Click the Preview button view a sample
page. After reviewing the Page, close the Preview page window.
You’re finished.You may click the Close button to close
Page Manager and return to the Site Administration Main Menu.