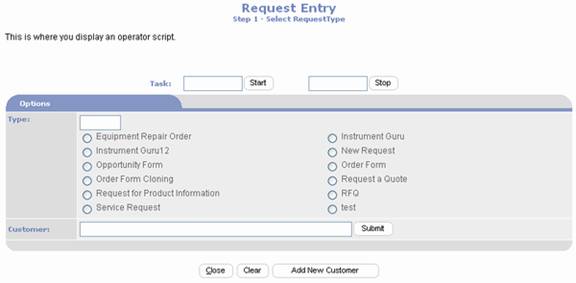
From Site Administration Main Menu,
click on the Add Requests icon to open the Add Request page shown
below.
To track your time while entering the
request click the button. If at any time you want to stop
the time log, click the button.When the Request entry process is completed the system will
automatically enter a stop time and save to the time log.
Operator instructions are displayed
directly below the Request Entry heading. This can be the script that you
want your help desk operators to use when answering support calls.Operator instructions are defined in Request
& Help Desk Feature Management.
You need to determine from the
customer the nature of their request so you can select a Request
Type.Request Types are listed as
radio button options.When a
Request Type is selected, the operator instructions are refreshed to
display specific instructions for the selected Request Type.
If the Request Type requires it to be
linked to a contact record, you need to find the customer’s contact
record.If they don’t have one, you
will need to add them as a new customer.To search for a customer you may enter any of the following into
the Customer criteria text box:
First Name + Last Name
First Name
Last Name
Company Name
Phone Number: enter in format 999.999.9999
Email Address
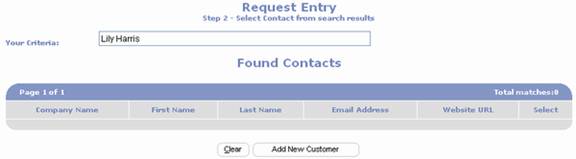
Click to perform search.Matches are listed on Request Entry Step
2 page as shown below.
If the Customer is shown click Select
to go to next step.You can modify
your criteria and press enter key to submit new search.
If the Customer is new, click to create a new Contact record.After saving the Contact record you will
be taken to the next step.
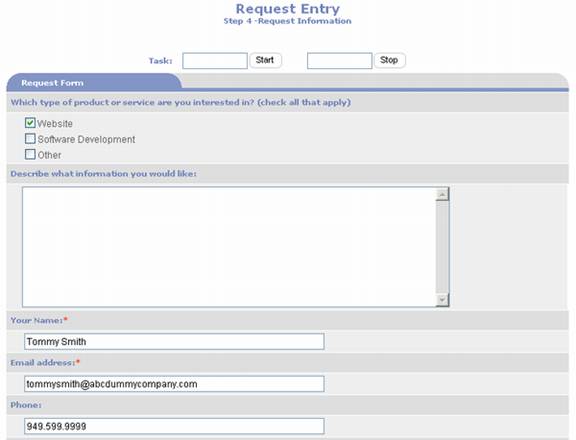
If payment is required you will be
prompted to enter the customer’s payment information, Step 3, otherwise
this step will be skipped.
Fill in the Request form, Step 4.
Click when you have completed the Request form.
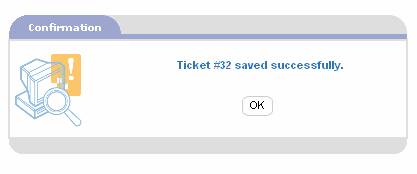
The last step in the Request Entry
process is the confirmation page.This page displays the assigned Ticket #.If you have the customer on the phone
during the entry process, be sure to give them their Ticket # which they
can use to check the status of their Request online.