Create a Quiz with Automated Scoring
What feature do I use?
Request Type Management.
What is the difference between
a Request and a Survey?
In a nutshell use a Survey when you want to survey people
and view the aggregate result. For everything else use a Request. The only
thing the two features have in common is that they use the same Form Builder
tool.
Steps to create a Quiz with
Automated Scoring:
1) Select
Add New Request Type which will go to Request Type Management.
2) In Type
field enter a name.
3) If
you want instructions to be displayed above the form enter them in the Description
field.
4) Click
Form Builder icon which will go to Form Builder.
5) In
the Form Builder Header section Form Builder Title field enter the same
name you entered in the Description field in Request Type Management.
6) Add
questions using Question Details section.
7) For
each question click Scoring & Branching button to go to Response Scoring
Management as shown below:

8) For
each response, in the Choice Score column enter a score value as an integer.
This value will be added to the user’s total score if they select the response.
9) Click
Close button and confirm save. You will be returned to Form Builder Management.
10) Repeat the above steps
for each question.
11) When finished entering
questions click on Define Score Messages link located in Form Builder Header
section to go to Score Messages Management as shown below:
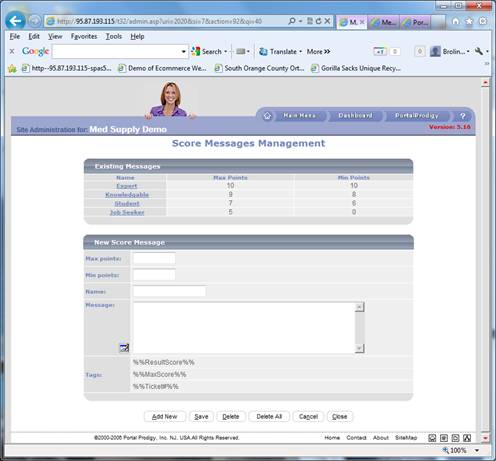
12) For each Grade (Score
Range) complete the New Score Message section and click Save or Add
New. Add New saves and puts you into add new mode whereas Save
leaves you in edit mode.
13) In the Max Points
field enter the upper range and in the Min Points field enter the lower
range.
14) The Name field is
optional. In the Name field you may enter a name for the Grade such as “A”,
“Expert”, or “Passed”.
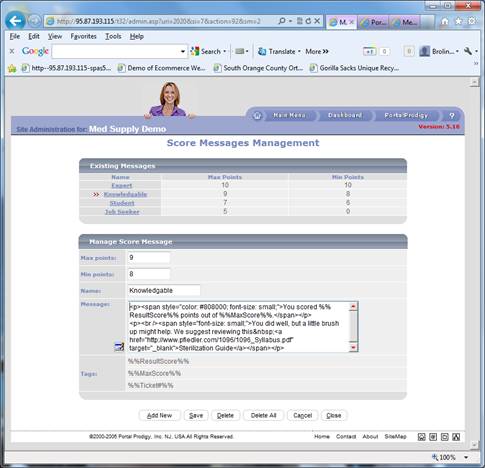
15) In the Message field
enter what you want the user to see after they submit their Quiz. See the
example below:
16) You can use the HTML
Editor to create the Message. The tags are dynamically replaced by applicable
values.
17) The tag
%%ResultScore%% inserts the user’s score.
18) The tag %%MaxScore%%
inserts the maximum possible score.
19) The tag %%Ticket#%%
inserts the Request ID. This is a reference number that can be used to retrieve
the user’s quiz.
In the example above we used the
HTML Editor which created the following HTML code for us:
<p><span
style="color: #808000; font-size: small;">You scored
%%ResultScore%% points out of %%MaxScore%%.</span></p>
<p><br /><span
style="font-size: small;">You did well, but a little brush up
might help. We suggest reviewing this <a
href="http://www.pfiedler.com/1096/1096_Syllabus.pdf"
target="_blank">Sterilization
Guide</a></span></p>
Which gets displayed as:
You scored 9 points out of 10.
You did well, but a little brush up might help. We suggest
reviewing this Sterilization Guide
Below is the actual page:

20) When finished entering
Grades, click Close and be sure confirm if prompted to save. This will return
you to Form Builder Management.
21) Click Close in Form
Builder Management and be sure to confirm if prompted to save.
22) Click Close in Form
Builder Management and be sure to confirm if prompted to save. This will return
you to Request Type Management. (If it returns you to Search for Survey Topics
don’t worry it just means your session timed-out and Form Builder did not know
that you called it from Request Type Management).
23) Click Close in Request
Type Management and be sure to confirm if prompted to save.
24) You can use Menu
Builder to add a link to your Quiz. In Menu Builder be sure to select “Feature
Record” radio button option for Menu Item Option field and select
“Request Type” as the feature. You can use the Search icon to select your
quiz.


